
A website launch checklist is the list of things to check before a new site goes live, while the address is switched over to it, and on the live site straight afterwards. This one is written for the person launching a site for a client: a freelance web designer or a small studio handing over a landing page, a business site or an online store. It splits the work into what you check yourself and what only the client can confirm, and it comes as a free Excel checklist with one tab per site type and a Word sign-off sheet, blank and filled in.
If you are launching your own site, the checks are the same. You play both parts.
Download the website launch checklist template and sign-off sheet
All three files are free and need no sign-up:
- Website launch checklist (Excel). A How to use tab and three checklist tabs, one per site type: Landing page, Business site and Online store. Each tab runs in the order you work: what the client confirms, the day before, the switch-over, and after launch. Every row has a Who column (You or Client) and a status of Done, Problem or Not needed.
- Launch sign-off sheet, blank (Word, A4). One page: what was launched and when, what the client confirmed, what is still open, whose name each account is in, and what happens next. It is not a contract.
- Launch sign-off sheet, filled in (Word, A4). The sheet for a fictional joinery business in Geelong, from the example further down.
Why does a client site need a different launch checklist?
Most launch checklists you will find are written for the owner of the site. They start with choosing a domain and end with telling your followers. When the site belongs to a client, the hard part is different. You can test every page yourself, but you usually cannot see three things that decide whether launch day goes well: where the client’s email is hosted, which inbox the enquiries go to, and what the final prices and phone numbers should say.
So this checklist has two owners. You check what you built. The client confirms what only they know, in writing, before the day. And it is split into three moments, because the things that go wrong happen at different times:
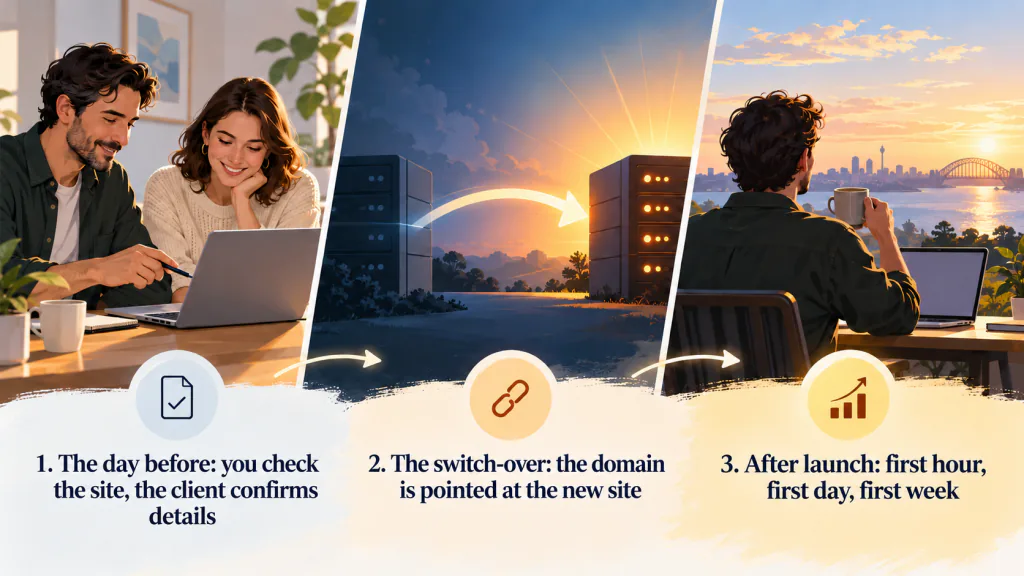
- The day before. The site is finished on a staging address. You run the checks for its site type. The client confirms their part.
- The switch-over. The go-live itself: the domain is pointed at the new site. This is the hour where email stops working or search engines get told to stay away, and it takes minutes to avoid.
- After launch. You check again on the real address: in the first hour, on the first day and in the first week. Then the client signs off.
What should the client confirm before launch day?
Send this list to the client at least a few working days before the launch date, so there is time to chase answers. Each line is something you cannot find out by looking at the site.
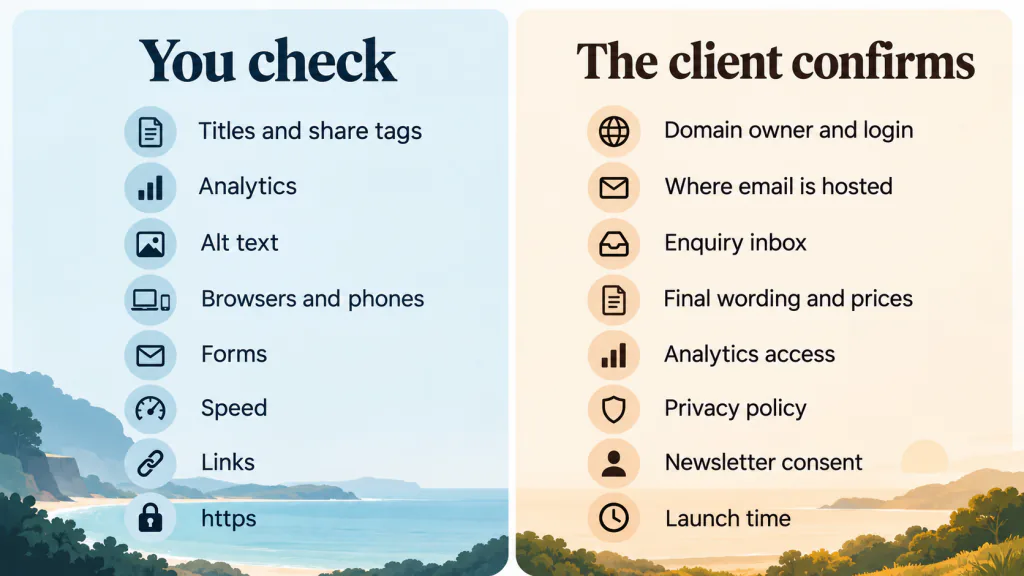
| The client confirms | Why you need it before the day |
|---|---|
| Whose name the domain is registered in, the login, and when it renews | You need access to change where it points. If the domain is in a former web designer’s name, sort that out before launch, not during it. |
| Where their business email is hosted, and who manages the DNS (the settings that say where the domain’s website and email go) | Changing the wrong records stops their email. You need to know which records to leave alone (see the switch-over below). |
| Which inbox gets enquiries from the forms | Forms often still send to the address used in testing, which is usually yours. |
| Final wording, prices, phone numbers, address and opening hours | These are the details customers act on. Get a written “approved” on the staging site, not a verbal one. |
| Analytics and Search Console set up in their own account, with you added as a user | If you set these up in your account, the client loses the history when you stop working together. |
| The privacy policy wording | A contact form collects personal information. Whether the Privacy Act applies depends on the business (see below), but the policy is the client’s to approve. |
| Whether a newsletter sign-up is used for marketing email | If it is, the client needs consent from each subscriber and a way to unsubscribe (see below). |
| The launch date and time, and who will be reachable for the hour after | Someone on the client’s side has to check the enquiry inbox and their email during the switch-over. |
For an online store, add one more: the payment account (the card payments provider, for example) is in the client’s name and has been approved to take real payments.
Does a small business website need a privacy policy in Australia?
Not always, which is why it is on the client’s list rather than yours. The Office of the Australian Information Commissioner says “Most small businesses are not covered by the Privacy Act 1988 , but some are.” It defines a small business as “one with an annual turnover of $3 million or less”, and lists businesses that are covered regardless of turnover, including “a health service provider” and a business “trading in personal information”. The OAIC points businesses to its Privacy Checklist for Small Business, or to their industry association or a lawyer. Your job is to ask the question and to put the policy page on the site once the client has decided what it says. Do not write the policy for them.
What about the newsletter sign-up form?
If the client will send marketing emails to people who sign up, the Spam Act applies. The Australian Communications and Media Authority puts it plainly: “If you plan to send marketing messages or emails, you must first have consent from the person who will receive them.” After that, each message has to identify the sender and make it easy to unsubscribe, and the ACMA adds that “it’s up to you to prove that you have a person’s consent.” For the launch, that means two checks: the sign-up form says what people are signing up for, and the email service records when each person signed up.
What do you check the day before launch?
Run these on the staging site (the private copy you built and tested on), on the version you are about to launch. Twelve apply to every site type. A business site and an online store add their own.
| Check | Landing page | Business site | Online store |
|---|---|---|---|
| Page titles and meta descriptions written for every page | Yes | Yes | Yes |
| Social share tags (the title, description and image shown when the link is shared) | Yes | Yes | Yes |
| Analytics tag installed and recording a test visit | Yes | Yes | Yes |
| Alt text on images that carry meaning | Yes | Yes | Yes |
| Favicon showing in the browser tab | Yes | Yes | Yes |
| Layout checked in every browser agreed in the scope | Yes | Yes | Yes |
| Layout and buttons checked on a real phone | Yes | Yes | Yes |
| Every form sent once with good details and once with a mistake | Yes | Yes | Yes |
| Load speed checked on a phone connection | Yes | Yes | Yes |
| No broken links or placeholder links left | Yes | Yes | Yes |
| How and when the host issues the security certificate (https) for the live address confirmed | Yes | Yes | Yes |
| sitemap.xml lists the pages you want found | Yes | Yes | |
| robots.txt (the file that tells search engines what not to read) checked for anything that blocks the whole site | Yes | Yes | |
| 404 page works and links back to the main pages | Yes | Yes | |
| Old page addresses listed, each with a redirect to its new page | Yes | Yes | |
| Test order placed, paid and refunded | Yes | ||
| Order confirmation email arrives and shows the right details | Yes | ||
| Shipping costs and options show correctly at checkout | Yes | ||
| Contact, shipping and returns pages published and linked | Yes | ||
| Privacy policy page published with the client’s approved wording, if the client has decided one is needed | Yes | Yes | Yes |
That is 12 checks for a landing page, 16 for a business site and 20 for an online store. Mark a row Not needed when it does not apply, such as the privacy policy line when the client has decided they do not need one.
A few of these deserve more than a tick:
- Forms, twice. Send each form once with good details and once with a missing or wrong field. The first proves the message arrives. The second proves the visitor sees a clear error instead of a blank page. On the day before, the message can come to you. On launch day it has to reach the client.
- Old addresses. If the new site replaces an old one, list the old pages that people actually visit or link to, and give each a redirect to the closest new page. A redesign that throws away every old address throws away the links other sites have pointed at them.
- Alt text. Write it for images that carry information: a product, a team photo, a chart. Decorative images can have empty alt text. This is a starting point, not an accessibility audit. Do not tell the client the site meets an accessibility standard unless it has been tested against one.
What can go wrong when you switch the site over?
The switch-over is usually a few changes in two places: the domain’s DNS settings and the site’s own settings. Keep this list open on the day and work down it in order:
- The day before: lower the TTL on the website records (the time other computers keep the old address before they check again), so the change is picked up sooner. Your DNS provider’s help pages say how.
- The day before: write down how to point the domain back to the old site, and keep the old site and a backup of it until the first week is over.
- Save a copy of every current DNS record (a screenshot or an export is enough) before changing anything.
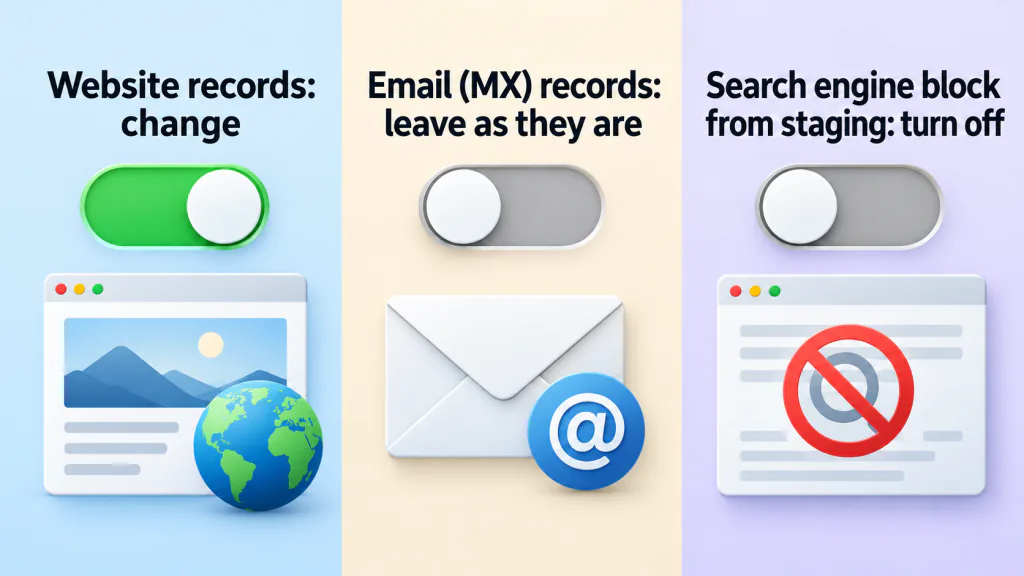
- Change only the website records so the domain points at the new site.
- Check that the email (MX) records are the same as before the change.
- Turn off the search engine block left over from staging.
- Pick one address for the site (with or without www) and make every other version redirect to it over https.
- Turn on backups for the live site, or confirm the host’s backups are running.
Choose a weekday morning for this, when you, the client and the host are all reachable for the next few hours. Steps 4 and 6 are where two common mistakes happen.
Email stops working
The domain’s DNS holds several kinds of record. Some point the website address at a server. Others, the MX records, tell the world where to deliver the business’s email. Moving a site means changing the website records only. The trouble starts when the whole set of records is replaced, for example by moving the domain to the new host’s name servers without copying the email records across. The site goes live and the client’s email quietly stops arriving.
Two habits prevent it. Before you change anything, save a copy of every current DNS record (a screenshot or an export is enough). Then change only the records for the website, and check afterwards that the email records are still the same. On the switch-over, ask the client to send and receive one email at their business address.
Search engines are still told to stay away
Staging sites are usually hidden from search engines, which is right while the site is unfinished. The setting then gets carried over to the live site. In WordPress, the box is under Settings, Reading, and the WordPress documentation describes what it does: “Check the Discourage search engines from indexing this site box to ask search engines not to index this site.” Since version 5.3, checking it adds a noindex robots tag to every page. Untick it on the live site, then open the live home page source and search for “noindex” (the tag that asks search engines to leave a page out of results). On other platforms, check the live page source the same way, and on an online store remove any password page that was hiding the shop before launch.
Check robots.txt at the same time. A staging robots.txt that says Disallow: / blocks crawlers from the whole site. Google’s own documentation makes the order matter: “For the noindex rule to be effective, the page or resource must not be blocked by a robots.txt file”. In other words, a page blocked in robots.txt can’t be read, so Google never sees whether it should be indexed or not. On the live site you want neither a site-wide noindex nor a site-wide block.
What do you check on the live site after launch?
The day-before checks were on staging. Now the same site sits on a different address, with a different certificate, different settings and real visitors. Check again on the real address.
In the first hour
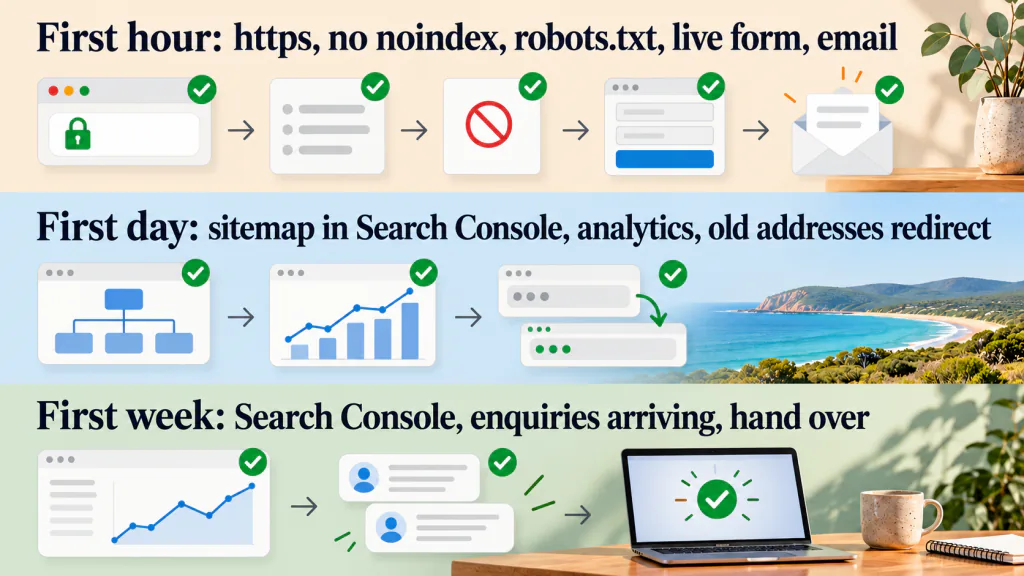
- Every page loads on the live address over https, with no browser warning.
- The live home page source has no noindex tag.
- The live robots.txt does not block the whole site.
- A form sent from the live site reaches the client’s inbox, and the client tells you it arrived.
- The client sends and receives an email at their business address.
On the first day
- Submit the sitemap in the client’s Search Console. Google is clear that this is a nudge, not a promise: “submitting a sitemap is merely a hint: it doesn’t guarantee that Google will download the sitemap or use the sitemap for crawling URLs on the site.” The Sitemaps report then shows when Google read it and any errors.
- Analytics records a visit to the live site (yours is fine).
- The ten most visited old addresses redirect to the right new pages.
In the first week
- Look at Search Console for pages it could not read or chose not to index.
- Ask the client whether enquiries are arriving as usual. Treat a week with no enquiries as a form problem until you have tested the form again.
- Hand the site over: either to a maintenance arrangement (see the website maintenance checklist) or to the client, with the sign-off sheet.
How do you get the client to sign off the launch?
Launch is the point where the project ends and the client takes responsibility for the site, or a maintenance arrangement starts. If that point is not written down, small fixes keep coming in for months as “part of the build”. The sign-off sheet is one page and records five things:
- What was launched. The site address, the date and time it went live, and the checklist attached with every row marked.
- What the client confirmed. The eight lines from their list, ticked.
- What is still open. Known issues, who fixes each one and by when. Being honest here is what makes the sign-off believable.
- Whose name each account is in. Domain, hosting, DNS, email, website admin, analytics, Search Console and any paid licences.
- What happens next. Maintenance from a date, or the end of your involvement, and how new requests are handled from here.
Send it with the final message of the project and ask the client to reply “approved” or sign it. It is not a contract. If your agreement says how the project is accepted, the sheet records that it happened. If you set out the deliverables at the start, it should match your scope of work.
A filled-in example: a business site launch for a joinery in Geelong (fictional)
Saltbush Joinery is a fictional business, invented for this guide. A two-person studio has rebuilt its six-page WordPress site, replacing an old one, and is launching it on Tuesday 3 November 2026 at 10:00 am.
- Client’s list, sent Wednesday 28 October. All eight lines were back by Friday 30 October except one: the client did not know where their email was hosted. The studio found the email records in the DNS and the client confirmed the email provider on Monday 2 November. The domain was in the client’s name, with the login in their password manager.
- Day before, Monday 2 November. The 16 day-before checks on the Business site tab found three problems: the quote request form still sent to the studio’s test inbox, two of the old site’s most visited pages (the kitchen gallery and the contact page) had no redirect, and the gallery loaded slowly on a phone because the images were large. The first two were fixed the same afternoon. The client agreed to launch with the gallery as it was and have the images compressed by Friday 13 November. The TTL on the website records was lowered and the old site’s backup was kept.
- Switch-over, Tuesday 3 November, 10:00 am. DNS records saved first. Only the website records changed. The “Discourage search engines” box was still ticked from staging and was unticked at 10:12 am.
- First hour. The client received a test quote request at 10:31 am and sent and received an email at their business address at 10:35 am.
- First week, to Tuesday 10 November. Search Console showed no pages it could not read, and the client confirmed quote requests were arriving as usual.
- Still open at sign-off. The gallery images, to be compressed by the studio by Friday 13 November.
- Next. Monthly maintenance from 1 December. The client signed the sheet on Tuesday 10 November.
The filled-in sign-off sheet shows this example on one page.
Running launch checks in TASKUL
TASKUL is our product, a task manager for freelancers and small studios. It has no launch checklist screen, so keep the Excel file for the checks themselves. TASKUL is useful for the parts of a launch that depend on other people and on dates:
- The client’s list as tasks. Invite the client to the project, turn each line they need to confirm into a task and assign it to them. They get an email when a task is assigned, and they can mark their own tasks done, so you can see which answers are still missing. An invited client can see the project’s whole task list, so keep internal notes somewhere else.
- The launch dates. Add the switch-over and the first-week check as tasks with due dates, so they appear under Due This Week on your dashboard. TASKUL does not send due-date reminder emails in English, so check the list yourself.
- The Pre-delivery check (Pro and Full plans). It reads a ZIP file of a site’s HTML and flags missing page titles, meta descriptions, share tags, favicons and alt text, and broken links between the pages in the ZIP. AI also looks for typos, and you can turn the findings into tasks. It works on files you can export as HTML, such as a hand-built landing page. It does not check a live WordPress, Shopify or Squarespace site, and it does not replace testing the forms, the switch-over or the live site yourself.
Website launch checklist FAQ
How long before launch should you start testing?
Start with the client’s list, because answers about domains and email take the longest to find. Run the day-before checks early enough on that day to fix what they find before the switch-over.
Is it a bad idea to launch a website on a Friday?
Not in itself, but problems show up in the first hours, and you want you, the client and the host to be reachable then. A weekday morning with no deadline later that day is the safer choice.
Do I need to submit a new website to Google?
You do not have to, but submitting the sitemap in Search Console (Google’s free tool for site owners) lets you see when Google read it and whether there were errors. See the first-day checks above for what Google says a submitted sitemap does and does not do.
Does a Shopify or Squarespace site need the same checklist?
Mostly. The platform looks after the security certificate and much of the technical setup, so some rows will be Not needed. The client’s list, the forms, the email records at the switch-over and the checks on the live address still apply, and a store’s launch includes removing the password page.
Can I use the checklist in Google Sheets?
Yes. Upload the Excel file to Google Drive and open it with Google Sheets. Each site type is its own tab, so you can delete the tabs you do not need before sharing it with a client.